
https://anc.yahoo.com/video/choose-grow-cook-herbs-101213306.html
Wednesday, February 25, 2015
Interviews
Last month we were invited to share some info about herbs. Here are links to ANC's Green Living and GMA's Good News.
https://anc.yahoo.com/video/choose-grow-cook-herbs-101213306.html
https://anc.yahoo.com/video/choose-grow-cook-herbs-101213306.html
Wednesday, February 11, 2015
Ashitaba part 3
The plants are growing really fast. These photos were taken January 9, 2015. Another batch of salad greens were planted beside them to use up space.


We've also planted some Ashitaba seedlings on pots. Can you guess which ones are growing faster? Watch out for the next post.
Friday, February 6, 2015
Ashitaba part 2
This is how we propagate our Ashitaba seeds.

These are Ashitaba seeds. We usually plant them with the flat (lighter color) side facing the soil. Do not bury the seeds or put too much soil over them or they will not sprout. Just put them on top of the soil and gently push them with your finger. Dont forget to moisten them with water through a mister everyday.

Several weeks later (in my case 2 weeks), the seeds will sprout. Not all seeds sprout the same day. Some of our seeds even took 5 weeks to sprout.

False leaves will appear after a few more days. Continue watering them as needed.

After a few days, true leaves will start to appear. It's time to put them in a bigger pot when the leaves are about a centimeter in diameter or bigger.
We hope you learned something from this post. If you have more questions or want to learn more about Ashitaba please leave us a message at the comment section.
Wednesday, February 4, 2015
Ashitaba part 1
Lately we've been planting some Ashitaba (Angelica Keiskei) in our garden. We got these seedlings around November 2014. We immediately planted some directly in the soil and some in big pots. Here are some pictures:


They suggest that the distance between plants should be around one meter. We decided to plant lettuces and other vegetables in between while the Ashitaba seedlings are still small.
More pictures and details to come...
Monday, October 14, 2013


Vermi Tea Brewing Instructions
Its been a long time since our last posting. 2011 was a busy year for us, traveling all around the country giving free seminars on organic farming.
This is for those who bought our VermiTea Brewer.
Fill your bucket or drum with non-chlorinated water
Place the brewer inside the container making sure the hook of the brewer is secured on the rim of the container
Connect the air hose of the brewer to the compressor
Place the compressor on a table higher than the water level of the container then plug it in an electric outlet
When the water starts to bubble, add your vermicast inside the brewer (chamber)
Add your molases
Recommended ratio is 2kg of VermiCast and 1kg of Molasses for every 120 liters of water.
Brewer for 18 to 24 hours
Application can be 1 part VermiTea plus 10 parts non-chlorinated water for garden/farm maintenance
For first time users, we suggest using a stronger dose of 1 part VermiTea to 5 parts non-chlorinated water
For sick plants or very poor soil, you can use pure VermiTea all over the soil and/or the plant/s
Frequency of use will depend on the health of your soil/plants
VermiTea can be used as often as 3 times a week or as seldom as once a month
It is very important to clean your brewer to avoid contamination of unwanted microorganisms in your VermiTea
Simply take off the top and bottom cover of the brewer and spray with running water
Take off the screen clamp and wash the screen
You may use a soft foam sponge or cloth to clean left over biofilms
DO NOT USE steel wool or other hard cleaning materials as this would leave rough surfaces on the brewer which can become colonies for microorganisms and leave biofilms which are hard to clean
Just reverse the disassembly procedure and your brewer is ready-to-use again
Friday, November 12, 2010
Mini Spiral Garden
The 3rd Pinoy Herbal Festival will be held at the AANI Herbal Center this coming November 19 to 21. The 3 day event will feature a lineup of free seminars about herbs and health and also herb propagation. I was invited to talk about herb propagation and how to start a small herb garden.
I am not a fan of power point presentations, during my lectures, I usually bring an actual product or machine to show my audience instead of a picture from my computer. Sometimes I show them pictures only because I can't bring the farm to them.
With my upcoming lecture, I decided to make a small garden that I can bring during the event.
Here's how I made my mini spiral garden:

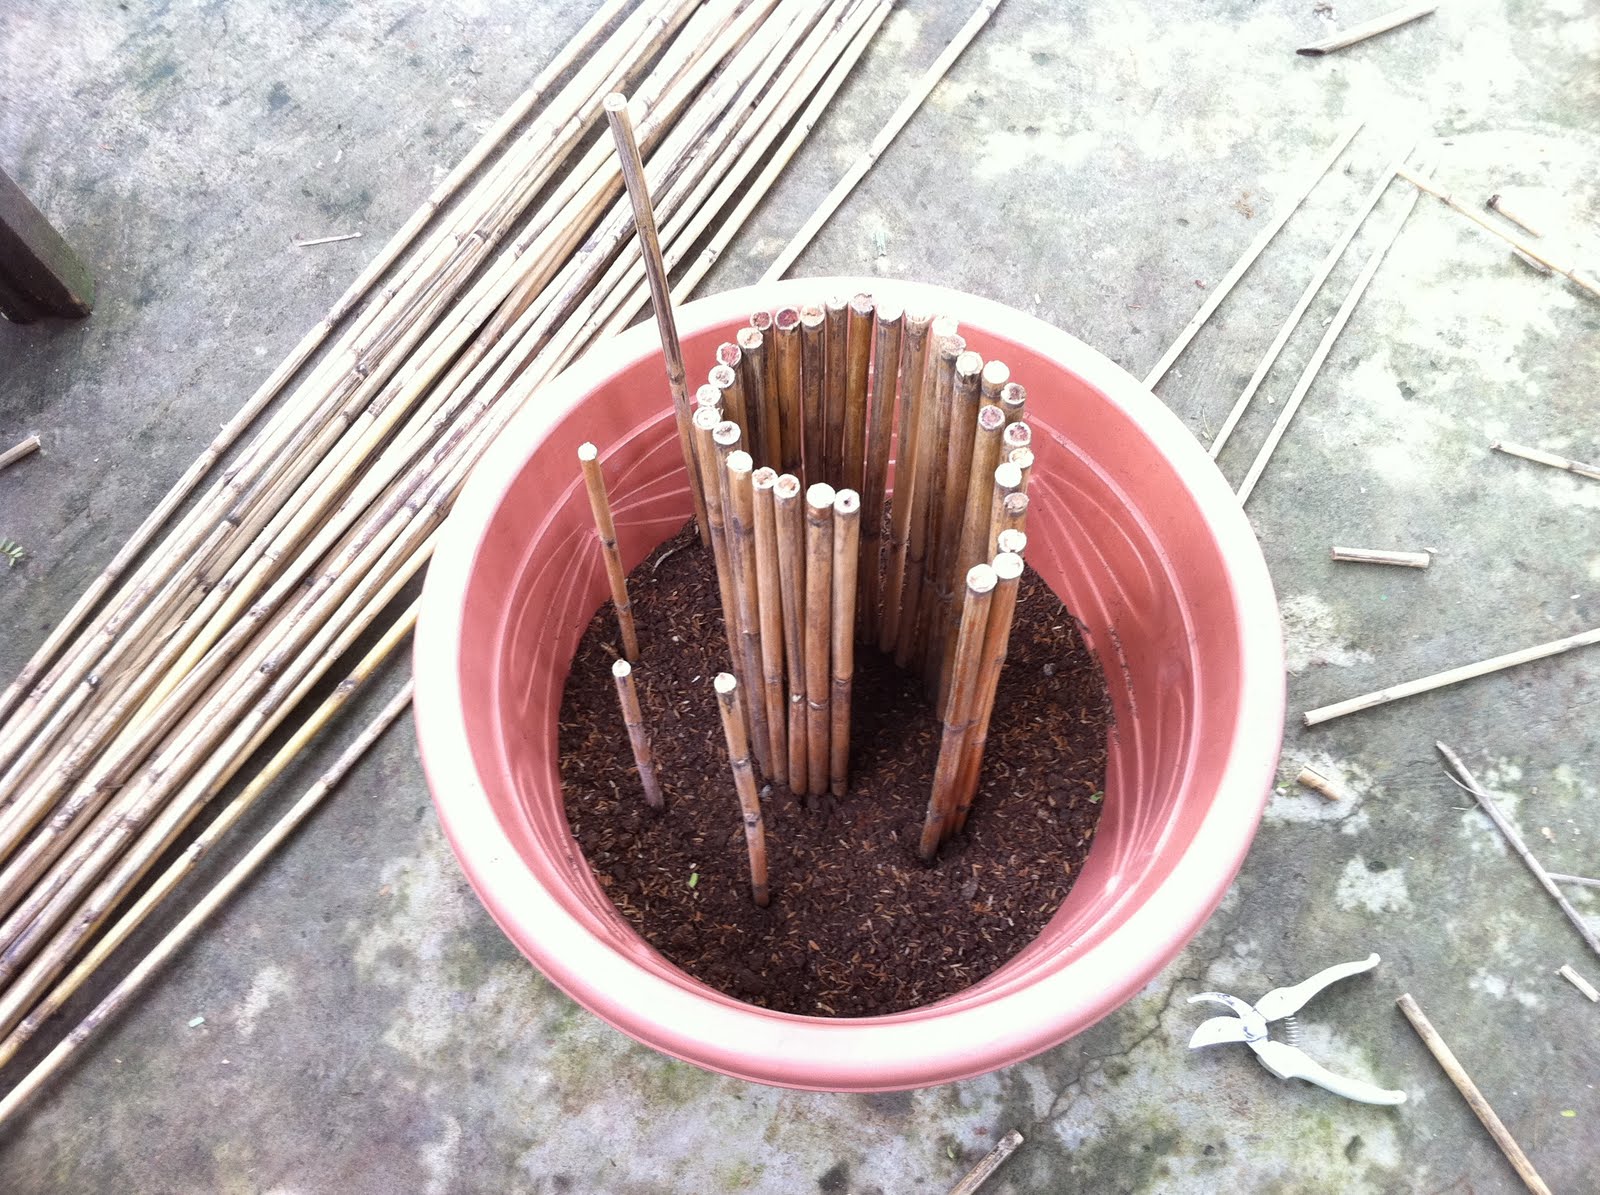


All it needs now are the herbs. Come and see the finished product on November 21, 9:00 a.m. at the AANI Herbal Garden, Quezon Memorial Circle.
Subscribe to:
Posts (Atom)

